Why Fiber Cleaning Has Two Methods
Modern fiber cleaning protocols are built around the inspection workflow described in Fiber Optic Cleaning Best Practices: inspect first to identify what kind of contamination is present, then choose the cleaning method that removes that contamination type, then re-inspect to verify. The wet-versus-dry decision happens during this loop based on what the inspection scope shows.
Dry Cleaning: How It Works
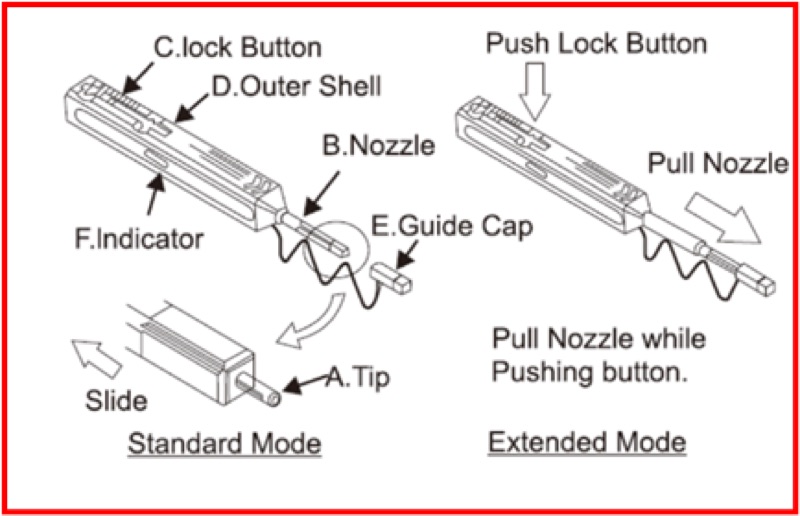
Dry cleaning uses a one-click cleaner that contains a sealed cassette of microfiber cleaning ribbon. The cleaner has a spring-loaded mechanism: pushing it onto the connector ferrule advances a fresh section of ribbon across the end-face and applies consistent cleaning pressure. The ribbon's microfiber surface lifts particulate contamination off the ferrule via direct contact and electrostatic attraction.
What Dry Cleaning Removes
- Loose dust and particulate: Most common contamination type. Dry cleans 90%+ of dust.
- Polishing residue: Microscopic glass dust from connector polishing during manufacture. Easily lifted by microfiber.
- Fiber strands and lint: Loose fibers from cleaning wipes or clothing.
- Light epoxy chips: Small bonding compound fragments that have not adhered to the glass.
Advantages of Dry Cleaning
Fast (a single click takes about 1 second), no chemicals, no residue, no waste, and no risk of solvent damage to connector materials. Most professional fiber cleaning is dry cleaning; wet cleaning is the exception, not the rule.
Limitations
Dry cleaning cannot remove oil, film, or anything that has bonded chemically to the glass. Pushing a dry cleaning ribbon across an oil film typically smears the oil rather than removing it, sometimes spreading the contamination across a larger area.
One-Click Cleaner Options
Cleaner models match ferrule sizes. The CLEP 2.5mm Mini Cleaner handles SC, FC, and ST. The CLEP 1.25mm Mini Cleaner handles LC and MU. Long-reach versions like the CLEP 2.5mm Long-Reach handle recessed connectors in dense panels. The Opti-Fiber Cleaner is a reel-type that handles multiple ferrule sizes with a single tool. The Fiber Lock Mini Cleaner is an alternative one-click style with secure cap retention.
Wet Cleaning: How It Works
Wet cleaning uses a small amount of fiber-grade isopropyl alcohol (99% or higher purity) applied to a lint-free cleaning wipe, gently brought into contact with the ferrule end-face. The IPA dissolves oil films and lifts off contamination that has chemically bonded to the glass surface.
What Wet Cleaning Removes
- Fingerprint oil: The most common reason for wet cleaning. Skin oil from handling the ferrule.
- Index-matching gel: Residue from mechanical splice connectors that use gel for refractive index matching.
- Cable jacket outgassing: Volatile compounds from PVC and other jacket materials that condense on the ferrule over time.
- Adhesive residue: From dust caps that have aged or failed and left adhesive on the ferrule tip.
- Anything sticky: Residue that does not lift with a dry clean almost always responds to IPA.
Advantages
Dissolves chemical contamination that no dry method can touch. Saves connectors that would otherwise need replacement. Necessary about 10% of the time in field environments.
Limitations
Slower than dry cleaning. Requires solvent supply (a small bottle of IPA in your kit). Leaves residue if not followed by a dry clean. Risk of solvent damage to plastic adapter housings or cable boots if applied carelessly.
Application Technique
Apply a small amount of 99% IPA to a fresh lint-free wipe (not a paper towel, not a cotton swab, not a piece of cloth). Touch the wet section of the wipe to the ferrule and rotate the connector slightly. Move to a dry section of the wipe and dry-wipe the ferrule. Immediately follow with a one-click dry clean. Never pour IPA directly onto the connector. Never use the same wipe section twice.
Wet vs Dry: At a Glance
The two methods are complementary, not interchangeable. Use this table to decide which is appropriate for the contamination you observe under the inspection scope.
| Factor | Dry Cleaning | Wet Cleaning |
|---|---|---|
| Speed | ~1 second per click | ~30 seconds per cycle |
| Removes Dust | Yes (90%+) | Yes |
| Removes Oil | No (smears it) | Yes |
| Risk of Residue | None | Yes (mitigate with dry follow-up) |
| Chemical Required | None | 99% IPA or fiber-specific solvent |
| Use Case | Default / first attempt | Escalation when dry fails |
| Frequency in Field | ~90% of cleans | ~10% of cleans |
The Dry-Wet-Dry Sequence
The standard cleaning escalation sequence is dry first, wet only if dry fails, then dry again to remove solvent. Here is the protocol step by step.
Step 1: Inspect
Use a fiber inspection scope at 200x or higher to see the end-face. Identify the contamination type. Dust looks like discrete particles. Oil looks like a smear or haze across the ferrule. See How to Inspect Fiber Connectors with a Microscope for the full procedure.
Step 2: Dry Clean
Push the appropriate one-click cleaner onto the ferrule until you feel the click. Single click, single clean. Do not push past the click; do not click multiple times in a row.
Step 3: Re-Inspect
If the end-face passes IEC 61300-3-35 criteria, you are done. If not, identify what remains. If it looks like a smear or haze, escalate to wet cleaning.
Step 4: Wet Clean (If Needed)
Apply 99% IPA to a fresh lint-free wipe. Touch the wet section to the ferrule, then move to a dry section of the same wipe to dry-wipe.
Step 5: Dry Clean Again
Immediately follow with a one-click dry clean. This removes any residual solvent before it dries on the end-face.
Step 6: Final Inspection
Re-inspect. The end-face should now pass. If it still fails after this full sequence, repeat once. If it fails again, the connector likely has embedded scratches or pits and needs replacement.
Common Wet-Cleaning Mistakes
- Using 70% IPA: The 30% water leaves a mineral residue on evaporation. Use 99% or higher.
- Pouring IPA on the connector: Wets adapter housings and cable boots, can damage plastics. Apply to wipe first.
- Using paper towels: Paper fibers stay on the ferrule. Always use lint-free fiber-grade wipes.
- Skipping the final dry clean: Solvent residue is contamination. Dry-wet-dry, every time.
- Reusing wipe sections: Each section of wipe gets one wipe. Move to a fresh section every time.
- Wet cleaning by default: Wet cleaning is escalation, not default. Try dry first; most contamination clears with a single click.
- Wet cleaning a connector that fails for scratches: Scratches are permanent. No amount of cleaning fixes them. Replace the connector.
Tools and Supplies for Both Methods
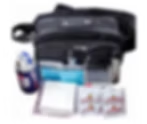
A complete cleaning kit covers both dry and wet methods plus the inspection capability to know which to use:
Wet Cleaning Supplies
99% IPA in a sealed bottle plus lint-free fiber wipes. Often included in pre-built cleaning kits.
Fiber Cleaning Kit ($99.99) bundles common cleaning supplies.
Inspection Scope
Required to know whether dry was enough or wet is needed.
QBL WiFi Fiber Microscope ($1,249.99)
The Bottom Line
Dry cleaning is the workhorse: fast, residue-free, and effective on most contamination. Wet cleaning is the specialist: slower, requires solvent, but indispensable for oil and film. The dry-wet-dry sequence covers every contamination type without leaving residue behind.
Carry both. Use dry by default. Escalate to wet only when inspection shows dry was insufficient. Always finish wet with another dry clean. The inspection scope tells you which method to use, not your guess. For more on the cleaning workflow, see Fiber Optic Cleaning Best Practices and How to Clean Fiber Connectors.