The Short Version
Why Unidirectional OTDR Loss Values Lie
An OTDR measures the optical power scattered back to the instrument from the fiber. The scattering coefficient — how strongly each meter of fiber returns light — depends on the fiber's manufacturing parameters: dopant concentration, mode field diameter, numerical aperture. These parameters are tightly controlled but never identical between lots, manufacturers, or even meters of fiber from the same spool.
At a splice between Fiber A (with backscatter coefficient X) and Fiber B (with coefficient Y), the OTDR sees two effects: the actual splice loss (call it L) and the difference between X and Y. From the A-side direction, the apparent loss is L + (X-Y)/2. From the B-side direction, the apparent loss is L + (Y-X)/2. The true splice loss L is the average of the two.
If X and Y differ enough, the apparent loss in one direction can be negative — a "gain" — even though the splice is actually lossy. This is the gainer artifact. It is a measurement artifact, not a physical phenomenon. Light cannot gain energy crossing a splice.
A Concrete Example
Suppose you splice two fibers and the true splice loss is 0.04 dB. Fiber A has a backscatter coefficient of -82 dB. Fiber B has a backscatter coefficient of -82.16 dB (Fiber B scatters 0.16 dB less than Fiber A). What does the OTDR see?
- From end A direction: apparent loss = 0.04 + (-82 - -82.16)/2 = 0.04 + 0.08 = 0.12 dB
- From end B direction: apparent loss = 0.04 + (-82.16 - -82)/2 = 0.04 - 0.08 = -0.04 dB (gainer)
- Average: (0.12 + -0.04)/2 = 0.04 dB (the true splice loss)
If you only tested from end A, you would think the splice was 0.12 dB and call it a failure. If you only tested from end B, you would think it gained 0.04 dB and call it perfect. Neither is correct. Only the bidirectional average reveals the actual 0.04 dB loss — a clean splice.
When Bidirectional Testing Is Required
- Carrier acceptance. All major carriers require bidirectional OTDR testing for new fiber installs. Telcordia, IEEE, and IEC standards specify bidirectional averaging for splice loss reporting.
- Splice characterization on long links. Long-haul links have tight loss margins; an artificially high splice loss in one direction may trigger a false re-splice while an artificial gainer hides a real problem.
- Mixed-fiber installations. Any time you splice fibers from different manufacturers or different generations of the same manufacturer, expect significant gainers and require bidirectional testing.
- OSP backbone documentation. Permanent records of splice loss should be true loss, not artifact-distorted unidirectional readings.
- Disputed splice loss claims. When a splice gets called out for excessive loss, bidirectional testing settles whether the loss is real or a measurement artifact.
When Unidirectional Is Acceptable
- Quick troubleshooting. When you are looking for a fault location (a break, a high-loss event), unidirectional testing from the most accessible end is fast and answers the question.
- FTTH drop verification. A drop has 1-2 splices and a generous link budget. Unidirectional from the head end is usually sufficient.
- Spot checks. Verifying that a known-good link still passes does not require bidirectional rigor.
- Pre-acceptance dry runs. Internal testing before formal acceptance can be unidirectional; the formal acceptance test is bidirectional.
For the basics of OTDR operation, see our OTDR testing basics and how to launch an OTDR test guides.
The Bidirectional Test Procedure
Step 1: Prep Both Ends
Both ends of the fiber under test need a launch fiber and a receive fiber (sometimes called pulse suppressors or dead-zone boxes). The launch fiber moves the first connector out of the OTDR's dead zone so it can be measured. The receive fiber does the same for the last connector. Without these on both ends, the first and last connectors are unmeasurable from at least one direction.
Clean every connector thoroughly with a 2.5mm fiber cleaner for SC/ST or a 1.25mm fiber cleaner for LC. Inspect with a WiFi fiber microscope before mating. A dirty connector at the OTDR launch point shows up as an event on every trace and can mask real problems.
Step 2: Test From End A
Connect the OTDR to the launch fiber at end A. Set wavelength, pulse width, range, and averaging time appropriate for the link. Run the trace. Save it with a clear filename (e.g., LinkID-A2B-1310nm.sor).
Step 3: Move to End B
Pack up. Move to end B. Connect the OTDR to the launch fiber at end B (which was the receive fiber for the A-direction test — but now it functions as the launch). Test with the same wavelength, pulse width, and range. Save with a corresponding filename (LinkID-B2A-1310nm.sor).
Step 4: Repeat for All Wavelengths
Standard SM testing requires both 1310nm and 1550nm. Run both traces in both directions. That is four files per link minimum. For long-haul or DWDM, add 1625nm.
Step 5: Run Bidirectional Analysis
Load both traces into the OTDR's bidirectional analysis software (most modern OTDRs have it built in; standalone software like AFL TRM, EXFO FastReporter, or VIAVI SmartReporter handles it on a laptop). The software identifies matching events in both traces and computes the averaged loss for each.
Step 6: Compare to Acceptance Spec
The averaged loss values are what you compare to your acceptance threshold (typically 0.1 dB per fusion splice, 0.5 dB per connector pair). Failing splices need to be re-done. Pass values become the documentation record.
Unidirectional vs Bidirectional at a Glance
| Factor | Unidirectional | Bidirectional |
|---|---|---|
| Splice loss accuracy | Distorted by gainer artifact | True loss, artifact-cancelled |
| Time required | ~5 min per wavelength | ~15-20 min per wavelength (single tech) |
| Crew required | 1 tech | 1 tech (move OTDR) or 2 techs (faster) |
| Receive fiber needed | Optional | Required |
| Carrier acceptance | Not accepted | Required |
| Use case | Troubleshooting, FTTH drops | Acceptance, characterization, documentation |
Equipment You Need
Fiber Ranger OTDR
Field-grade OTDR with built-in bidirectional analysis and trace storage for end-A and end-B traces.
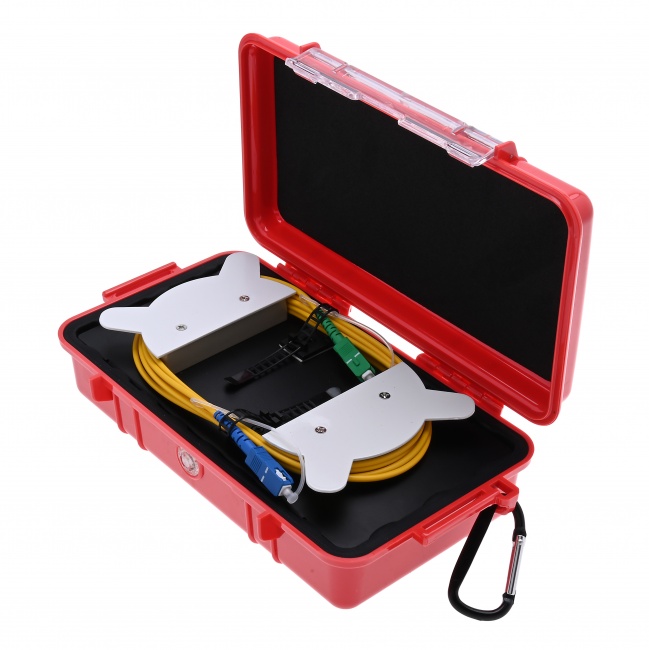
Launch and Receive Fibers
100-500m of fiber with quality connectors on each end. One pair (or two single fibers, used as launch on one end and receive on the other) is required for proper bidirectional measurement.
2.5mm Fiber Cleaner
Clean SC, ST, and FC connectors before every connection. Critical for repeatable OTDR readings.
WiFi Fiber Microscope
Inspect every endface before mating. Dirty connectors masquerade as real events.
LC/APC Male Inspection Tip
For inspecting LC/APC bulkhead connectors common in FTTH OLT and ONT terminations.
SC Fixed Attenuator 5dB
Optional inline attenuator for high-power OTDR testing into short links to prevent receiver saturation.
Common Bidirectional Testing Mistakes
- Skipping the receive fiber. Without one, the last connector cannot be measured from one direction. Bidirectional analysis fails on the connectors.
- Different test parameters between directions. If you change pulse width or wavelength between the two traces, the events do not match cleanly. Use identical settings.
- Not cleaning connectors between directions. Dust accumulated during the move shows up on the second trace and corrupts the average. Clean every time.
- Mismatched event detection. If one direction detects an event and the other does not (often due to noise or settings), the bidirectional analysis cannot pair them. Re-run with longer averaging time.
- Storing traces with poor filename discipline. Months later you will not remember which file was end A and which was end B. Use clear, consistent filenames.
- Testing only one wavelength. Bidirectional at 1310nm only misses macrobend events that show up at 1550nm. Test both.
Frequently Asked Questions
What is bidirectional OTDR testing?
Testing a fiber link from both ends and averaging the loss values for each event. Eliminates the gainer artifact and produces true splice loss.
What is a gainer in OTDR testing?
An apparent gain at a splice — backscatter goes up instead of down. It is a measurement artifact caused by mismatched backscatter coefficients between the two fibers, not a real physical gain. Bidirectional averaging cancels it.
Can I use one OTDR for bidirectional testing?
Yes. Test from end A, move the OTDR to end B, test again. Two OTDRs speed it up but are not required. Most modern OTDRs have built-in bidirectional analysis software for combining the traces.
How much can the two directions differ?
For matched fibers from the same lot, typically 0.01-0.02 dB. For mismatched fibers, 0.05-0.15 dB or more. Apparent gainers of 0.05-0.10 dB are common between fibers from different manufacturers.
Is bidirectional required for FTTH drops?
Usually no. FTTH drops are short with generous link budgets and typically just one splice. Unidirectional testing from the head end is sufficient unless the customer specifies otherwise.
Related Reading
OTDR and Test Equipment
Field-grade OTDRs, launch and receive fibers, fiber cleaners, and inspection microscopes for accurate bidirectional testing.