The Five-Step Workflow
What the Meter Is Actually Doing
An optical power meter contains a photodiode (typically InGaAs for telecom wavelengths or germanium for legacy 850nm work) that converts incoming light into an electrical current. The meter measures that current and applies a calibration curve to convert it into an optical power reading in dBm. The accuracy of the reading depends on three factors: the calibration of the meter itself, the wavelength setting matching the actual signal wavelength, and the connector being clean enough that the photodiode receives the full signal.
Calibration is the manufacturer's job; you handle it through annual recalibration cycles. Wavelength matching is your job at the start of every measurement session. Connector cleaning is your job before every measurement -- not "every job" or "every link" but every single measurement. We will get to why that matters in a minute.
Step 1: Clean Everything
Connector contamination is the single biggest source of incorrect power readings in the field. A clean connector pair adds about 0.2 to 0.5 dB of insertion loss. A dirty connector pair can add 1, 2, even 5 dB of loss, which looks exactly like a network problem when in fact the fiber is fine.
Clean the Patch Cord
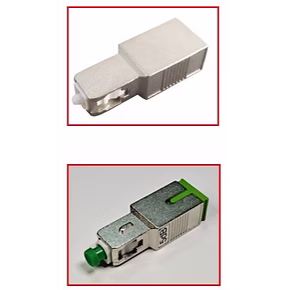
Use a one-click cleaner sized for the connector type (LC, SC, ST, or universal 2.5mm). Push the connector ferrule into the cleaner cartridge and press until you hear the click. That single motion wipes the endface against a clean cleaning ribbon and rotates the ribbon for the next use. The CLEP-25 Mini Fiber Cleaner handles 2.5mm ferrules (SC, FC, ST) and the CLEP-125 Mini Fiber Cleaner handles 1.25mm ferrules (LC, MU).
Clean the Meter Port
Power meter ports collect dust as fast as patch cord endfaces. The internal mating sleeve is hidden in the bulkhead, but it still has an exposed mating face that contacts the patch cord ferrule. Use a small brush-style port cleaner or a stick cleaner sized for the port (1.25mm for LC, 2.5mm for SC). Insert, twist a quarter turn, and remove. Cap the port immediately after cleaning if you are not measuring right away.
Inspect with a Microscope
If you have any reason to doubt the patch cord cleanliness -- it has been used a lot, or you are getting inconsistent readings -- inspect the endface with a fiber microscope. The Wifi Fiber Microscope connects to a phone over Wi-Fi and shows the endface at 200x magnification. Most contamination is invisible to the naked eye but obvious under the scope.
For a deeper dive on cleaning technique, see our guide on cleaning fiber connectors.
Step 2: Set the Correct Wavelength
The meter's detector responds to a wide range of wavelengths but not equally. Internal calibration tables compensate for the responsivity difference at standard telecom wavelengths: 850, 1300, 1310, 1490, 1550, and 1625nm. You select the calibration that matches the signal wavelength. Most basic meters cycle through wavelengths with a single button press; PON meters automatically apply the correct calibration for each filtered wavelength.
How to Pick the Wavelength
- Single-mode dark fiber loss test: Measure at both 1310nm and 1550nm. Loss differs at each wavelength, and many specifications require results at both.
- Multimode dark fiber loss test: Measure at 850nm and 1300nm.
- Live GPON downstream: 1490nm (use a PON meter, not a basic meter).
- Live XGS-PON downstream: 1577nm.
- Live 1550nm video overlay: 1550nm.
- Generic single-mode network: Match the transceiver wavelength on the system datasheet.
Setting the wrong wavelength is one of the easiest mistakes to make and one of the hardest to catch later. A measurement spreadsheet that says "good" with the wavelength column blank is essentially a guess.
Step 3: Reference the Light Source
This step applies only to insertion loss measurements where you are testing dark fiber with a calibrated light source. For live PON measurements, skip ahead -- you are measuring an absolute power level, not relative loss.
Single-Cord Reference Method
Connect one launch cord between the light source and the power meter. Turn on both instruments, set them to the same wavelength, and wait 30 seconds for the source laser to stabilize. Press the meter's reference (REF or dB) button. The meter zeroes itself and now reads 0.00 dB. This is the reference state -- the meter is reporting the difference between the current power and the launch cord output.
Disconnect at the Meter, Not the Source
Critical detail: never disconnect at the source side after referencing. The source-to-launch-cord connection is now part of your reference. Disconnecting and reconnecting it changes that connection's loss and invalidates the reference. Always disconnect at the meter side, insert the fiber under test in line, and reconnect to the meter.
Two-Cord vs Three-Cord Methods
The single-cord (one-jumper) method gives the most repeatable results because it counts only the launch cord connector loss in the reference. Two-cord and three-cord methods add additional connectors that vary between setups. For acceptance testing where small dB matters, the single-cord method per TIA-526-7 (single-mode) or TIA-526-14 (multimode) is the standard.
Step 4: Connect the Fiber Under Test
With your reference established, connect the launch cord to the fiber under test at the source end. At the far end, connect a receive cord between the fiber under test and the meter. The meter now reads the total loss of the link including the connectors at both ends, the fiber attenuation, any splices, and any bending or macro-bend losses.
Loss Reading Interpretation
The meter shows a negative dB number such as -3.42 dB. This means the link inserts 3.42 dB of loss between source and receiver. Compare this against the engineered link budget. A typical campus single-mode link should show 0.5 to 2 dB of loss; an OSP run might be 5 to 15 dB depending on length and splice count.
Bidirectional Testing
Best practice is to measure in both directions and average the results. Connector loss varies slightly with launch direction due to small misalignments. Bidirectional averaging removes this asymmetry and gives the most accurate result. Most acceptance test specifications require bidirectional measurement.
Measuring Live PON Power (Different Workflow)
Measuring optical power on a live PON network is a different procedure. You are not measuring relative loss, you are reading the absolute power level of an active signal at a particular point in the network. There is no reference step.
PON Measurement Procedure
- Use a PON-specific meter such as the XGS/GPON Power Meter or 25G PON Power Meter. A basic meter cannot separate wavelengths and will give a meaningless combined reading.
- Clean the connector and meter port as in Step 1.
- Disconnect the fiber from the equipment (ONT, OLT splitter port) you want to test the power at.
- Connect the fiber to the PON meter input port.
- The meter automatically separates each wavelength and displays power for downstream and upstream simultaneously.
- Compare each reading against the equipment's specified receiver sensitivity (typically -8 to -28 dBm for GPON downstream at the ONT).
For a wavelength-by-wavelength breakdown of which PON meter handles which standards, see our GPON vs XGS-PON power meter comparison.
Common Mistakes That Ruin Readings
| Mistake | Effect on Reading | Fix |
|---|---|---|
| Dirty connector or port | Adds 1-5 dB false loss | Click-clean every time |
| Wrong wavelength setting | 0.5-2 dB calibration error | Match source wavelength |
| Source not stabilized | Drifting reading 0.1-0.5 dB | Wait 30s after power on |
| Reference disconnected at source | Reference invalid | Disconnect at meter side only |
| Basic meter on live PON | Combined wavelength garbage | Use PON meter with filters |
| Wrong direction measured | Skewed by connector asymmetry | Measure bidirectionally, average |
| Macro-bend in patch cord | 0.5-3 dB false loss | Avoid coiling tight, no kinks |
How to Interpret a Reading
A power meter reading is just a number. What matters is comparing it to a specification.
Insertion Loss vs Link Budget
Every fiber link has an engineered loss budget based on length, splice count, and connector count. A typical FTTH drop allows 2 to 3 dB end-to-end. A 10km single-mode trunk might allow 4 to 6 dB. Your measured loss must fall under the budget. If the measurement exceeds the budget, the link fails acceptance and needs rework -- a bad splice, a dirty connector, or an unaccounted bend.
Absolute Power vs Receiver Sensitivity
For live network testing, compare the measured power against the receiver's sensitivity window. GPON ONTs accept -8 to -28 dBm downstream. XGS-PON ONTs accept -8.5 to -28 dBm. If the measured power falls outside this window, the receiver will not authenticate or will experience errors. Too high a signal saturates the receiver; too low a signal falls below detection threshold.
Trending Over Time
Document every reading with location, date, wavelength, and power. A fiber that read -14 dBm at install and reads -22 dBm six months later has degraded by 8 dB -- that is a real problem worth investigating. Without baseline data, you have no way to recognize gradual degradation before it causes service outages.
Tools You Need to Use a Power Meter Properly
- The meter itself: Optical Power Meter LC ($79.99) for basic insertion loss work, XGS/GPON Power Meter ($484.99) for live PON testing.
- A calibrated light source matched to your meter's wavelength range (for insertion loss only).
- Clean launch and receive cords -- single-mode jumpers like the LC/UPC duplex single-mode patch cord for SM work.
- Connector cleaners -- the CLEP-25 for 2.5mm ferrules and the CLEP-125 for 1.25mm.
- A fiber inspection scope -- the Wifi Fiber Microscope for verifying endface cleanliness.
- Documentation method -- spreadsheet template, mobile app, or test results software for recording readings.
The complete Fiber Cleaning Kit bundles the cleaners and basic accessories at a discount versus buying individually.
Frequently Asked Questions
What units does an optical power meter display?
Optical power meters display readings in dBm (decibels relative to one milliwatt) or in linear units like microwatts or milliwatts. dBm is the standard for fiber work because it makes loss math additive: -10 dBm losing 5 dB equals -15 dBm. Most meters toggle between dBm and linear, but every spec sheet uses dBm.
Do I need to set the wavelength on a power meter?
Yes. The detector inside the meter has wavelength-dependent sensitivity, and internal calibration tables compensate for it. Setting 1310nm but measuring 1550nm produces a 0.5-2 dB error. Always match the meter wavelength to the source wavelength. PON meters with bandpass filters handle this automatically per channel.
How do I take a reference measurement?
Connect a launch cord between the source and the meter. Turn on both, set the wavelength, wait 30 seconds for stabilization, then press the meter's reference (REF or 0 dB) button. The meter now reads 0 dB. Disconnect at the meter side, insert the fiber under test, reconnect, and read the loss in dB.
Why is my power meter reading negative numbers?
dBm values below 0 represent powers below 1 milliwatt, which covers virtually all telecom signals. -8 to -28 dBm is the normal GPON downstream range at the customer ONT. The more negative the number, the lower the power. Negative dBm is normal and expected.
Should I clean the connector before every measurement?
Yes. A single fingerprint can add 1 dB or more of loss that mimics a real fault. Clean both the patch cord ferrule and the meter port before every measurement. Use a click cleaner like the CLEP-25 and inspect with a fiber microscope when readings seem off.
Get the Right Equipment
A power meter is only useful if it matches the work you do. Browse the lineup:
- Optical Power Meter LC ($79.99) -- Basic optical, LC interface, point-to-point testing.
- XGS/GPON Power Meter ($484.99) -- Best for FTTH installers running GPON and XGS-PON.
- CLEP-25 Mini Fiber Cleaner and CLEP-125 Mini Fiber Cleaner -- Click cleaners for SC/FC and LC ferrules.
- Wifi Fiber Microscope -- Endface inspection at 200x.
For comparing the full lineup, read Best Fiber Optic Power Meters 2026. To understand how power meters complement OTDRs, see OTDR Basics.