The Short Version
Why the Distinction Matters
Most splice loss problems on outdoor jobs trace back to environmental factors that simply do not exist indoors: wind blowing alcohol off the cleaving area, gel-filled buffer tubes contaminating fiber holders, sunlight glare on the splicer screen, condensation forming on a cold splicer brought into a warm vehicle. A technician who does excellent indoor work can struggle outdoors until they learn the environmental tricks.
The reverse is also true. OSP splicers who try to set up the same way they do at a manhole inside a tight central office MDF end up wasting time. Indoor work rewards organization, cable management, and labeling discipline far more than environmental control.
For broader splicing context, see our step-by-step fusion splice guide and fusion splicer buying guide.
Outdoor vs Indoor Splicing at a Glance
| Factor | Outdoor (OSP) | Indoor (ISP) |
|---|---|---|
| Cable type | Loose-tube, gel-filled, ribbon | Tight-buffer, indoor riser, plenum |
| Closure | FOSC dome, pedestal, aerial closure | Splice tray in FDP / patch panel |
| Splice count per session | 12-144 (closure dependent) | 2-48 (panel dependent) |
| Environment | Weather, wind, dust, temp swings | Climate-controlled, clean |
| Power source | Splicer battery + spare | AC mains via extension cord |
| Lighting | Sunlight glare or low light | Overhead fluorescent / LED |
| Cleaning frequency | Every splice + V-groove daily | Every splice, V-groove weekly |
| Setup time | 15-30 min (tent, table, gear) | 5-10 min (open kit, plug in) |
The Outdoor Splicing Workflow
Outdoor splicing is a logistics problem first and a fiber problem second. The splice itself takes 30 seconds; getting to a state where you can splice cleanly takes most of the time.
1. Site Prep
Park the splice van or set up the splice tent over the closure or work area. If you are working at a handhole, position the tent so the closure can sit on a clean surface (a folding table, the tailgate, or a dedicated splicing table) inside the tent. For aerial work, a bucket truck with a splice tray on the platform is the standard.
Block the wind. Even a light breeze blows alcohol off your cleaning wipes before you can use them and pushes dust into the splicer V-grooves. A three-sided tent or a splice van interior is non-negotiable for any closure with more than a few splices.
2. Cable Access and Prep
OSP cables are loose-tube and almost always gel-filled. Strip back the outer jacket, expose the buffer tubes, and clean every fiber with isopropyl alcohol and lint-free wipes. The gel contaminates everything — your gloves, your scissors, the splicer fiber holders. Wear nitrile gloves and change them when they get tacky. Keep a dedicated gel-removal solvent (like D-Gel or equivalent) in the splicing kit.
Pre-load the splice closure with the heat-shrink protection sleeves before you start splicing. Sliding sleeves on after the splice is done is awkward inside a closure; pre-loading makes the splice cycle faster.
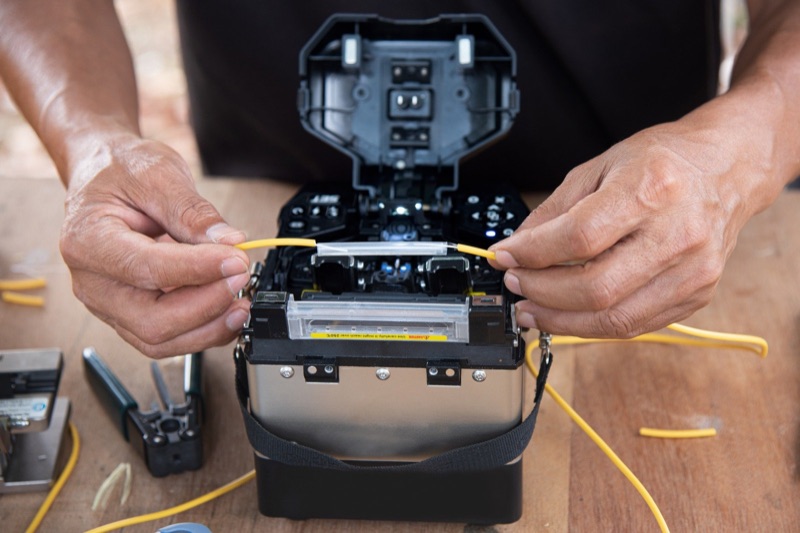
3. Splicing
Set up the splicer on a stable surface — never balanced on top of the closure or a coil of cable. The splicer needs to be level for the V-grooves to work properly. Use a cabling splicing table or a flat folding table at a comfortable working height (sitting or standing).
Inspect every cleave with a microscope or trust the splicer's cleave-quality readout. Outdoor cleaving is harder than indoor cleaving — wind and uneven surfaces hurt cleave quality. A bad cleave produces a high-loss splice no matter how good the splicer.
4. Closure Assembly
After all splices are done and protected, route fibers into the splice tray inside the closure. Maintain minimum bend radius (typically 1.5 inches for single-mode). Secure the cable strain relief, install the closure gasket, and seal the closure per the manufacturer's instructions. A leaking closure will fill with water within months and the splices will fail one by one.
The Indoor Splicing Workflow
Indoor splicing prioritizes organization and labeling. The environment is forgiving; the cable management is not.
1. Site Prep
Open your fiber splicing kit, set the splicer on a stable workbench or rolling cart, plug into AC mains, and set up task lighting if the overhead lighting is poor. There is no tent, no wind blocking, no battery management. Setup takes minutes.
Identify the splice tray location. Indoor splices live in fiber distribution panels (FDPs), wall-mount enclosures, or rack-mount splice trays. Pull the tray out into a working position with enough slack to splice comfortably without pulling on neighboring fibers.
2. Cable Prep
Indoor cables are tight-buffer or indoor riser. No gel, less debris, but the buffer is bonded directly to the fiber so stripping must be careful. Use a precision buffer stripper. The fibers are color-coded per TIA-598; verify the color order matches your records before splicing.
Inside data centers and central offices, fiber tray real estate is at a premium. Plan your splice routing before you start splicing. Where will the loops go? Where will the protection sleeves sit? Where will the breakouts come back out of the tray?
3. Splicing
Splice using the same procedure as outdoors but with the luxury of clean V-grooves, predictable cleaves, and stable lighting. Splice loss should consistently come in at 0.02-0.04 dB on single-mode core-alignment splicers. If indoor splices are running higher, the problem is almost always tooling — dirty cleaver blade, worn electrodes, or poor stripping technique.
4. Tray Organization
The biggest indoor-specific skill is splice tray layout. Loops must maintain bend radius. Spliced fibers should be routed in parallel, never crossing. Each splice protection sleeve should sit in its dedicated holder slot. Label every cable port. See our splice tray organization guide for detailed best practices.
Tools That Differ Between OSP and ISP
Splicer Choice
For OSP, ruggedized field splicers with high IP ratings, drop protection, and large batteries dominate. The QBL Fusion Splicer is built for field abuse with a sealed enclosure and a removable battery. A second battery is essential — a closure with 48 splices will eat one battery before you finish.
For tight indoor work or aerial drop splicing where you need to work in a bucket or crawl space, a palm fusion splicer wins on size. For bench-grade ISP work where bench space is plentiful, a full-size splicer is more comfortable.
Cleaver
OSP cleaving is harder on the blade because of dust and gel residue. Use a high-quality precision mechanical cleaver and rotate the blade more often. Clean the cleaver pads after every closure.
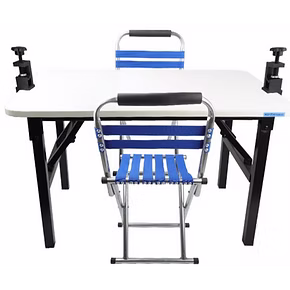
Splicing Table
OSP techs need a portable, stable, weather-tolerant table. A cable table with flex-arm accessories mounts the splicer, cleaver, and tray rack at comfortable heights and folds down for transport. ISP techs can use any clean bench, but a dedicated cabling splicing table with accessories still pays off in repeatability.
Cleaning Supplies
OSP work needs more cleaning supplies because of higher contamination rates. Stock a full FTTH tool kit with isopropyl alcohol, lint-free wipes, gel solvent, fiber cleaner sticks (2.5mm CLEP for SC/ST and 1.25mm CLEP for LC), and a cassette-style cleaner for the OTDR launch fiber.
Inspection
Both environments need a connector microscope. The WiFi fiber microscope is convenient outdoors because the image goes to a phone (no squinting through a tiny eyepiece in low light) and indoors because it captures pass/fail records you can save to a job file.
Outdoor-Specific Environmental Hazards
- Wind: Blows alcohol off wipes before they can clean, pushes dust into V-grooves, and disturbs the arc on some splicers. Always work inside a tent or vehicle.
- Direct sun: Glare washes out the splicer LCD and makes microscope inspection impossible. Position the work area in shade or use a sun shroud.
- Cold: Below freezing, batteries lose 30-50% of capacity, cleaver blades dull faster, and heat-shrink takes longer. Bring spare batteries warmed in a coat pocket.
- Heat: Above 40C, splicer cooling fans struggle, electrodes contaminate faster, and the tech does too. Work morning and evening, take breaks midday.
- Humidity / rain: Water on fiber end-faces creates immediate splice failure. Even high humidity raises bubble formation in the arc. Shelter is mandatory in rain.
- Insects: Mosquitoes, gnats, and spiders find their way into open splice closures and onto cleaved fibers. A tent helps; a quick visual check before placing fiber in the V-groove helps more.
- Rodents: Not a splice-time hazard but a closure-design issue. Sealed armored closures are the answer.
Safety Considerations
Both environments require laser safety goggles when working with live fiber or VFL injection. Outdoor adds: high-voltage awareness near aerial cables, traffic management at street-level handholes, and confined-space procedures for vault work. Indoor adds: arc flash awareness in MDFs near power equipment and respect for building access policies.
Fiber shards are a hazard everywhere. Use a sharps container for cleaved fiber ends and never leave bare cleaved ends on the table. A barely visible 125-micron shard in a fingertip is painful and hard to find.
Frequently Asked Questions
Can you fusion splice outdoors in cold weather?
Yes, but with limits. Most splicers operate down to -10C. Below that, batteries lose capacity, cleaver blades dull, and heat-shrink sets slowly. A splice tent with a small space heater extends the season. Avoid bringing a cold splicer into a warm space without letting it equalize — condensation on the optics will cost you a session.
Why do my outdoor splices have higher loss than indoor?
Three causes. Wind-blown contamination on the cleave or fiber end-face. Gel residue from loose-tube cables. Tool wear from harder field conditions. Clean V-grooves and electrodes more often, change cleaver blades sooner, and inspect every cleave before splicing.
Do you need a splice tent?
For more than 4-6 splices outdoors, yes. For a single drop splice in calm dry weather you can manage without one, but the splice quality and your sanity both suffer.
What is OSP vs ISP fiber?
Outside Plant (OSP) is loose-tube, gel-filled, armored, and rated for direct burial or aerial. Inside Plant (ISP) is tight-buffer, indoor riser, plenum, or fan-out and rated for inside building installation. Most jobs have a transition splice where OSP cable comes into the building and connects to ISP cable.
Field-Ready Splicing Equipment
Ruggedized fusion splicers, splicing tables, splicing kits, and cleaning supplies built for outdoor and indoor fiber work.