What Fusion Splicer Electrodes Do
The fusion splicer fires a high-voltage electric arc between two tungsten electrodes positioned on either side of the fiber alignment plane. The arc generates the heat that melts the fiber end-faces and fuses them together. The electrode tips are the source and target points for that arc.
Tungsten is used because it has the highest melting point of any metal (3,422 degrees C) and tolerates the repeated high-temperature arcing without immediately disintegrating. Even so, every arc evaporates a tiny amount of tungsten from the electrode tips. Over thousands of arcs, the tips become rounded and pitted, the gap between them changes slightly, and the arc characteristics drift.
When arc characteristics drift, splice quality drifts with them. The arc may not deliver enough energy to fully melt the fibers (resulting in cold splices that look fine but have high loss), or it may deliver too much energy and deform the cores (resulting in visible bubbles or core distortion in the splice image).
When to Replace Electrodes
Manufacturer-Specified Arc Count
Every fusion splicer tracks its arc count in firmware. The arc counter increments each time the splicer fires the fusion arc (cleaning arcs and pre-fusion arcs may or may not count, depending on the manufacturer). Most manufacturers specify electrode replacement at 1,500 to 3,000 arcs. The QBL Fusion Splicer specifies 2,000 arcs as the recommended replacement interval.
Check the arc counter at the start of each work day. When it approaches the manufacturer-specified limit, plan for replacement before the next field trip. Replacing electrodes proactively is faster and cheaper than troubleshooting bad splices in the field with no spare electrodes available.
Splice Quality Drop
Even before hitting the arc count limit, electrodes may show signs of wear. Watch for these symptoms:
- Increasing average splice loss: Splices that used to estimate 0.02 dB are now estimating 0.05-0.08 dB consistently.
- Inconsistent results: Some splices pass at 0.03 dB, others fail at 0.15 dB on the same fiber, same prep, same conditions. This is the classic worn-electrode pattern.
- Repeated arc calibration failures: The splicer cannot dial in correct arc current during calibration. The calibration routine may report "out of range" or simply repeat without converging.
- Visible defects in splice images: Bubbles, dark spots, or asymmetric melt patterns visible on the splicer's display after the arc.
Visible Electrode Wear
Open the splicer and look at the electrode tips under magnification (a fiber inspection scope works fine for this). Fresh electrodes have sharp, conical tips. Worn electrodes show:
- Rounded or blunted tips
- Visible pitting or craters
- White silicate deposits (residue from vaporized fiber coating)
- Asymmetric wear (one tip more worn than the other)
Any of these visual indicators means the electrodes are nearing end-of-life. White silicate deposits can sometimes be cleaned off with an electrode cleaning arc cycle; physical erosion cannot be cleaned and requires replacement.
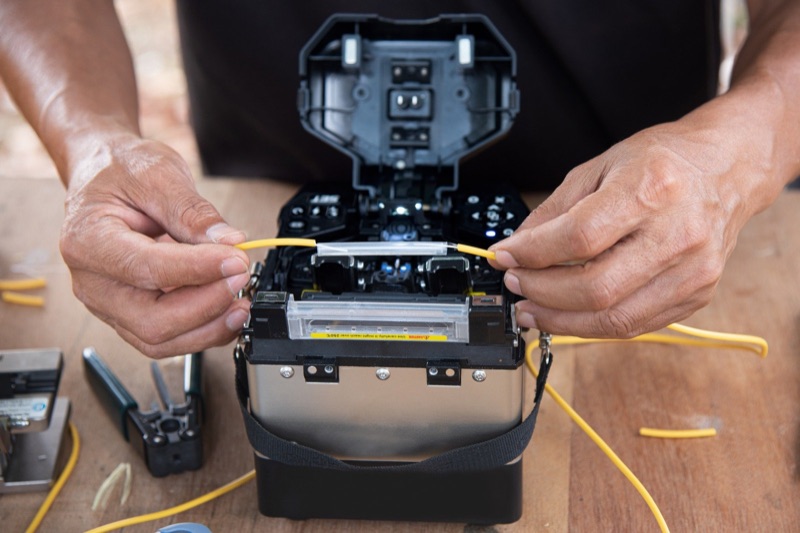
How to Replace Fusion Splicer Electrodes
The procedure varies slightly by splicer model, but the general steps are the same. Always consult your specific splicer manual for the exact procedure.
Step 1: Power Down and Disconnect
Turn off the splicer and disconnect the AC adapter and remove the battery. The splicer can store charge in capacitors that drive the arc. Wait 60 seconds after powering down before opening the electrode covers.
Step 2: Open the Electrode Covers
Open the splicer windshield. The two electrodes are located on either side of the fiber alignment area, typically held in place by small thumbscrews or quick-release covers. Loosen the screws or open the covers to expose the electrodes.
Step 3: Remove the Old Electrodes
Each electrode is held by a clamp or screw. Loosen the clamp and gently pull the electrode straight out of its mount. Do not yank or twist -- the electrode tips are fragile and the mounting bores can be scratched if mishandled. Discard the old electrodes (they contain trace amounts of metal vapor deposits but are not hazardous; standard waste disposal is fine).
Step 4: Install the New Electrodes
Open the new electrode pair from the manufacturer's packaging. Handle the electrodes by the body, not the tips -- skin oils on the tip will contaminate the arc. Insert each electrode into its mounting bore, fully seated against the stop. Tighten the clamp to the manufacturer's specified torque. Over-tightening can crack the ceramic insulator at the base of the electrode.
Step 5: Reinstall the Covers
Replace the electrode covers and tighten the thumbscrews. Close the windshield. Reconnect power.
Arc Calibration After Replacement
Fresh electrodes have different arc characteristics than worn ones. The arc current calibration that worked for the old electrodes will deliver wrong arc energy with the new electrodes -- typically too much energy, because new electrodes have lower resistance than worn ones. Always recalibrate after replacement.
Run the Arc Calibration Routine
Most splicers have an arc calibration function in the maintenance menu. Prepare two single-mode fibers as if for a normal splice (strip, clean, cleave). Load them in the splicer. Start the arc calibration routine. The splicer fires a series of test arcs at different current levels, analyzes the splice quality from each, and dials in the optimal current setting for the new electrodes.
The calibration may take several minutes and consume 5-10 fibers. This is normal and necessary. Do not skip calibration to save fiber.
Run Conditioning Arcs
After calibration, run 30-50 splices on scrap fiber to condition the electrodes. New electrodes have a brief initial period where arc characteristics stabilize as surface contamination is burned off and the tip geometry settles. Splices made during this conditioning period may have slightly higher loss; do not use them for production. After 30-50 arcs, run another arc calibration to refine the current setting now that the electrodes have stabilized.
Cleaning vs Replacement
Not every electrode performance issue requires replacement. Sometimes a cleaning is enough.
When Cleaning Helps
Cleaning is appropriate when the electrodes have white silicate buildup but are not yet physically worn. Silicate comes from vaporized fiber primary coating that did not fully strip off the bare glass. It accumulates on the electrode tips over time and can disrupt arc characteristics.
How to Clean Electrodes
Most splicers have an electrode cleaning function in the menu. This fires a sequence of arcs without fiber present, which oxidizes and burns off surface deposits. Run the cleaning cycle, then check splice quality with a few test arcs.
Alternatively, with the splicer powered off, gently wipe the electrode tips with a lint-free swab moistened with 99% IPA. Be very gentle -- the tips are fragile. Do not use a metal probe or any abrasive.
When Cleaning Does Not Help
If splice quality remains inconsistent after a cleaning arc cycle and an arc calibration, the electrodes are physically worn and require replacement. Do not waste fiber and time trying to clean electrodes that are at end-of-life.
Electrode Lifecycle Quick Reference
| Stage | Arc Count | Symptom | Action |
|---|---|---|---|
| New / Conditioning | 0-50 | Slightly elevated splice loss | Run conditioning arcs, re-calibrate |
| Optimal | 50-1,500 | Consistent low-loss splices | Normal use; track arc count |
| Mid-life | 1,500-2,000 | Slight silicate buildup possible | Run electrode cleaning arc if loss creeps |
| End of life | 2,000-3,000 | Inconsistent loss, calibration drift | Replace electrode pair |
| Past EOL | 3,000+ | Repeated splice failures, calibration fails | Replace immediately |
Common Mistakes with Electrode Replacement
- Replacing only one electrode: Always replace as a matched pair. Asymmetric electrodes produce asymmetric arcs.
- Touching the tips: Skin oil contaminates the tips and disrupts the arc. Handle electrodes by the body only.
- Skipping arc calibration: Fresh electrodes have different arc characteristics than worn ones. Always run calibration after replacement.
- Not running conditioning arcs: The first 30-50 splices on new electrodes may show slightly elevated loss. Use scrap fiber for conditioning.
- Using non-OEM electrodes: Electrode tip geometry, alloy composition, and mounting dimensions are specific to the splicer model. Always use the manufacturer's specified electrode part number. Off-brand electrodes may fit physically but produce wrong arc characteristics.
- Storing spares improperly: Electrodes should be stored in their original packaging until use. Loose electrodes in a tool kit accumulate dust and skin oil that contaminate the arc when first installed.
- Ignoring the arc counter: The counter exists for a reason. Check it weekly and plan replacements before they fail in the field.
How to Maximize Electrode Life
Electrodes will eventually wear out, but several practices can extend the usable life of a pair.
- Strip fiber coatings completely: Residual primary coating that gets vaporized by the arc deposits silicate on the electrode tips. Clean strips reduce silicate accumulation.
- Clean bare fiber thoroughly: Contamination on the bare glass burns into deposits on the electrodes. Always wipe with 99% IPA before splicing.
- Run electrode cleaning arcs periodically: Once a week or every 200 splices, run the cleaning cycle to burn off surface deposits.
- Keep the splicer covered when not in use: Dust accumulating on the electrodes during storage causes spike contamination on the first arc when the splicer powers up.
- Store the splicer in moderate temperature: Extreme heat or humidity can accelerate electrode oxidation. Aim for normal indoor storage between trips.
- Use the right splicing program: Each splicer has programs optimized for different fiber types. The wrong program can deliver too much arc energy, accelerating electrode wear.
For details on splicer maintenance beyond electrodes, see how to clean fusion splicer v-grooves and fusion splice troubleshooting.
Keep Spares On Hand
Electrode failure in the field is a productivity disaster. A pair of spare electrodes in the splicer case, plus the small tools needed for replacement, costs little and prevents lost work days.
Splicer Maintenance Kit
Spare electrodes, electrode wrench (if required by your splicer), cleaning swabs, 99% IPA wipes, and a fiber inspection scope for examining electrode tips.
Add: WiFi Fiber Microscope for inspecting electrode wear up close.
Field Splicer Battery
A worn electrode plus a dead battery is a wasted truck roll. The QBL Fusion Splicer Replacement Battery is a hot-swap option for extended field days.
Frequently Asked Questions
How often should fusion splicer electrodes be replaced?
Most fusion splicer manufacturers specify electrode replacement every 1,500 to 3,000 arcs, with 2,000 arcs being a common interval. The splicer's arc counter tracks usage. Replace electrodes when the counter hits the recommended limit, when splice loss starts increasing, or when the electrode tips show visible erosion or contamination.
What are the signs that fusion splicer electrodes need replacement?
Worn electrodes produce inconsistent splice loss, require longer arc times, show visible wear or rounded tips, accumulate white silicate buildup at the tips, and cause repeated arc calibration failures. The splicer may display arc errors or reject splices that should pass.
Can I clean fusion splicer electrodes instead of replacing them?
Yes, mild contamination on electrode tips can be cleaned by running an electrode cleaning arc cycle or by gently wiping the tips with a lint-free wipe and 99% IPA. However, cleaning only removes contamination -- it does not restore eroded tungsten. If the electrodes are physically worn, cleaning will not help and replacement is required.
Do fusion splicer electrodes come in pairs?
Yes. Always replace electrodes as a matched pair, even if only one appears worn. The two electrodes work together to deliver the fusion arc, and asymmetric wear causes asymmetric arc energy, which produces poor splices. Replacing one electrode and leaving the other will not restore consistent splice quality.
How do you run an arc calibration after replacing electrodes?
After installing fresh electrodes, prepare two single-mode fibers, load them in the splicer, and run the arc calibration routine from the splicer's maintenance menu. The splicer fires several test arcs and adjusts arc current to match current atmospheric conditions and the new electrode characteristics. Run 30-50 conditioning arcs on scrap fiber before relying on the splicer for production work.
Shop Fusion Splicers and Spares
Fusion splicers, replacement batteries, splicing kits, and consumables for FTTH and OSP technicians.