Why micro cable exists
Conventional OSP fiber installation has a fundamental constraint. A duct can only hold one cable, the cable can only be pulled so far before friction overwhelms the strength members, and adding capacity later means digging up the duct or pulling out the existing cable. Telecoms and ISPs have spent decades fighting this constraint with larger ducts, intermediate vaults, and pull-relief lubricants.
Microduct systems solve the problem differently. Instead of one large duct, you install a bundle of small-diameter HDPE microducts (typically 7, 10, 12, or 14 mm ID) inside a single conduit or directly buried. Each microduct holds one micro cable. Cables are blown in with high-velocity air rather than pulled, which eliminates the friction limit and allows multi-kilometer installation in a single shot.
The result is a dense, expandable fiber plant where you can deploy capacity as demand arrives instead of overbuilding on day one.
Cable construction differences
Standard loose tube OSP
Conventional OSP cable has 250 micron coated fibers in gel-filled or dry-block buffer tubes, stranded around an FRP central member, with aramid yarn strength layer and a 1.5 to 2.5 mm thick HDPE jacket. A 144-fiber traditional loose tube cable is roughly 18 to 22 mm in outer diameter. We covered the layered construction in our Fiber Cable Construction article.
Micro cable
Micro cable shrinks every layer to maximize fiber density:
- 200 micron coated fiber instead of 250 micron, reducing each fiber subunit by 36 percent in cross-section
- Thinner buffer tubes with lower wall thickness
- Reduced or eliminated central strength member in the smallest counts
- Lighter aramid yarn package sized for jetting forces, not pulling
- Thin HDPE jacket with lower friction coefficient for blowing performance
- Often ribbon fiber subunits in the highest count cables
The density gain is dramatic. A 144-fiber micro cable is typically 7 to 8 mm in outer diameter, less than half the size of its traditional loose tube counterpart.
Diameter comparison by fiber count
| Fiber Count | Standard Loose Tube OD | Micro Cable OD | Density Gain |
|---|---|---|---|
| 12 fiber | 9 to 12 mm | 4 to 5 mm | ~5x by area |
| 24 fiber | 11 to 14 mm | 5 to 6 mm | ~5x by area |
| 48 fiber | 13 to 16 mm | 6 to 7 mm | ~4x by area |
| 96 fiber | 16 to 19 mm | 6.5 to 8 mm | ~5x by area |
| 144 fiber | 18 to 22 mm | 7 to 8 mm | ~6x by area |
| 288 fiber | 22 to 27 mm | 9 to 11 mm | ~6x by area |
| 432 fiber | 26 to 31 mm | 11 to 13 mm | ~6x by area |
| 864 fiber | not common | 13 to 15 mm | n/a |
The density gain compounds when you consider the duct system. A 50 mm direct-buried HDPE conduit can hold one 30 mm traditional cable (432 fibers) or seven 14 mm microducts each carrying a 432-fiber micro cable (3,024 fibers total). Same trench, seven times the capacity. This is why microduct dominates greenfield FTTH and metro backbone deployments.
Installation method differences
Traditional pull
Standard cable is pulled with a winch and pulling rope. The cable manufacturer specifies a maximum pull tension (typically 2,700 N for 144-fiber cable). Pull lengths are limited by friction; 500 to 1,000 meters is typical between intermediate vaults where the cable is figure-eighted out and re-pulled. Lubricant reduces friction but cannot eliminate it. Long pulls require careful planning, capstans, intermediate assist winches, and pull tension monitoring.
Air-assisted blowing (jetting)
Micro cable installation uses a compressor to push high-velocity air through the microduct while a tractor unit grips the cable jacket and feeds it in. The airflow distributes pulling force along the entire cable length rather than concentrating it at the head. Properly executed, you can place 1 to 2 kilometers of micro cable per blow with minimal accumulated tension on the cable.
For long runs, you set up intermediate jetting points. Once one segment is blown, you connect to the next jetting station and continue. The total installable length per project is essentially unlimited.
Cost comparison
Per foot of cable, micro cable is comparable to or slightly more expensive than traditional cable, sometimes 10 to 30 percent more. The cost story shifts when you look at the system:
| Cost Element | Traditional | Microduct |
|---|---|---|
| Cable per foot | Lower per foot | 10 to 30% higher per foot |
| Duct material | One large conduit | Multi-way microduct bundle |
| Trenching cost | Same trench width | Same trench width |
| Initial deployment cost | Lower if you fully use one cable | Higher (more microducts unused day one) |
| Capacity expansion cost | Very high (re-trench or replace) | Marginal (blow new cable into spare microduct) |
| Labor per fiber-meter delivered | Higher | Lower at scale |
| Equipment cost | Standard puller and lubricant | Compressor and jetting machine ($50K+) |
For one-time deployments where you fully utilize the cable on day one, traditional pulled cable is cheaper. For long-lived infrastructure where you expect to add capacity over decades, microduct wins by an enormous margin because each new cable does not require new trenching.
When to choose each
Choose micro cable / microduct when
- Building new urban or suburban FTTH backbone
- Deploying long-haul or metro routes you expect to expand
- Working in restoration scenarios with congested existing duct banks
- Pulling distance exceeds 1 km between handholes
- You need rapid deployment of segments without waiting for trenching
- Multiple service providers will share the conduit (each gets dedicated microducts)
Choose traditional loose tube cable when
- One large cable will fully utilize the available conduit on day one
- The route is short (under 500 meters) with easy access for pulling
- The environment is rough and a heavier armored jacket is required
- The site lacks space, power, or budget for jetting equipment
- Aerial installation where micro cable's lighter strength members are insufficient
- Direct buried in rocky soil where heavy armor is mandatory
Splicing and termination
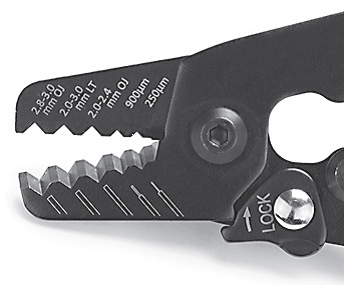
Micro cable splices the same as traditional cable from the fiber's perspective. The 200 micron coating strips with the same Miller stripper, cleaves with the same cleaver, and fusion splices on the same core-alignment fusion splicer (or any modern fusion splicer that supports 200 micron fibers, which is most of them).
The cable jacket prep is different. Micro cable jackets are thinner and easier to strip, and the buffer tubes are smaller. Splice closures designed for micro cable have smaller cable entry ports and integrated microduct sealing fittings. Make sure your splice closure inventory includes micro-cable-compatible enclosures before you commit to a microduct deployment.
Test the spliced sections with an OTDR at both 1310 and 1550 nm. We cover the procedure in How to Launch an OTDR Test. Document each splice loss in your closeout package.
Microduct system planning
If you are designing a microduct system, plan for:
- Microduct count: Standard bundles are 4-way, 7-way, 12-way, or 19-way. Order the highest count you can justify; spare ducts are cheap, future trenching is not.
- Microduct size: 7/4 mm (7 OD, 4 ID) holds smaller cables. 16/12 mm holds larger cables. Most projects use 12/10 mm or 14/10 mm as the standard.
- Coupler quality: Microduct couplers must be air-tight to maintain jetting pressure. Use manufacturer-matched couplers, not generic.
- Identification: Color-coded microducts and printed length marks help avoid blowing the wrong cable into the wrong destination.
- Handhole spacing: Place handholes every 500 to 1,000 meters for jetting access and future drop locations.
Equipment requirements for jetting
To install micro cable you need:
- Compressor: Continuous duty 185 to 375 CFM at 100 to 150 PSI
- Jetting machine: Tractor unit with cable feed wheels and air seal head
- Microduct adapter kit matching the microduct ID
- Cable parachute attached to the cable head to maximize air drag
- Pressure gauge to monitor backpressure (high backpressure indicates obstruction)
- Distance counter on the jetting machine
A complete jetting setup is a $50K to $100K equipment investment. For small contractors, renting from a regional supplier is more practical until volume justifies ownership.
Industry adoption
Microduct deployment has become the global default for new FTTH and metro fiber. European telecoms adopted it in the 1990s; US deployment has accelerated since 2015 with rural broadband funding programs requiring microduct-ready architectures. Greenfield builds today are almost universally microduct, while brownfield builds may still use traditional cable into existing conduit.
For pre-terminated drops at the curb or premise, micro cable feeds compact terminals that connect to LC duplex patch cords for ONT installation. The full chain from backbone to subscriber is now optimized for compact, dense, future-proof deployment.
FAQ
What is fiber micro cable?
Micro cable is a reduced-diameter outside plant fiber cable designed for blowing or jetting into HDPE microducts. A typical 144-fiber micro cable is 6.5 to 8 mm in outer diameter, less than half the size of a comparable traditional loose tube cable. It uses 200 micron coated fibers and lighter strength members to maximize fiber count per millimeter of cable diameter.
How do you install micro cable?
Micro cable is installed by air-assisted blowing or jetting. A compressor pushes high-velocity airflow through the duct while a tractor unit grips the cable and feeds it in. Properly executed, you can place 1 to 2 km of micro cable per blow with minimal pulling tension. The technique requires specialized blowing equipment but eliminates the friction problems of traditional cable pulls.
What fiber counts come in micro cable?
Micro cable counts range from 12 fibers up to 864 fibers in current production. Common configurations are 96, 144, 288, and 432 fibers in 6 to 13 mm diameter cables. The highest count micro cables use ribbon fiber subunits and 200 micron coated fibers to pack maximum density.
Is micro cable more expensive than standard fiber?
Per foot of cable, micro cable is comparable or slightly more expensive. The savings come from the duct system, not the cable itself. A 7-way microduct bundle in a 50 mm conduit can carry 7 micro cables totaling thousands of fibers, where one traditional 13 mm OSP cable would only carry a few hundred. Per fiber-meter delivered, microduct systems are dramatically cheaper.
Can I splice micro cable to standard fiber?
Yes. Both use the same 125 micron cladding diameter. A fusion splicer handles the transition with no special preparation beyond stripping each cable type appropriately. Plan your splice closure to accommodate both cable jackets and provide adequate strain relief and storage for both fiber bundles.
Can micro cable be used aerially?
Most micro cable is designed for duct installation and lacks the strength members for aerial spans. Some manufacturers offer aerial micro cable variants with messenger wire or ADSS-style construction, but for typical aerial work standard loose tube ADSS cable is still the better choice.
How long does jetting take per kilometer?
Typical jetting speeds are 30 to 60 meters per minute under ideal conditions, so a 1 km blow takes 15 to 30 minutes once setup is complete. Setup, microduct continuity test, and breakdown add another 30 to 60 minutes per location. A skilled crew can place 4 to 8 kilometers of micro cable in a productive day.
Related Reading
Build dense fiber networks with confidence
From fusion splicers to OTDRs to inspection tools, find what you need to install and certify micro cable systems at ShopFiberOptic.